Saturday, February 27, 2016

Chili Rellenos

DSC_0240[1]
Much like a lot of other people, before I made these I was really intimidated by them.  It just seemed like so much could go horribly wrong… the cheese filling could all come out during the frying and create some horrible catastrophe, the coating won’t stay on leaving you with a fried chile mess, etc…  None of that happened the first time, or any of the times after (and there have been many).  Now I will say this, you will get your hands a little messy.  I have yet to find a really good way that keeps my hands completely clean.
I did my usual and scoured the internet for chile rellenos recipes and found quite a few variations.  One of the things I didn’t use was the corn.  I’ve never had them with corn and honestly didn’t want to.  I also found some chile rellenos casseroles for those that just didn’t want to attempt the real thing.  I suppose it would be good for a pot luck or something where deep frying a bunch of individual chile rellenos was just not feasible.  One more note on the casserole thing (honestly I was trying to be positive about it even though it just doesn’t sound right…) a few recipes used canned chilies and I have two words for that…..NO BUENO!!!  If you are seriously thinking of going the casserole road please use fresh roasted chilies.
Ok, didn’t mean to digress… back on to the recipe.

For the Recipe:
4 large poblano chilies, roasted, skinned and deseeded
2 c. Monterey jack cheese, shredded (sometimes I’ll mix in other sharp cheese just to give it a little pizazz)
4 egg whites
2 egg yolks
1 tbsp. flour, plus more for coating the chilies
1 tsp. salt
oil for frying
special sauce for serving, recipe follows
Start by roasting your chilies, I do my right on the burner.  Once all sides are sufficiently blackened, place them in a back to cool.  Once you can handle them peel the skin off and deseed by making a slit up the side of the chile, about 3/4 of the way, and scoop out or use your fingers.  Set aside.  Start heating the oil now, should be ready by the time you finish the next steps.  Next, make the coating.  Whip the egg whites to stiff peaks.  Mix 1 tablespoon flour and the salt with the two egg yolks and mix well.  Fold the egg yolk mixture into the egg whites, do not over mix or it will deflate.  Now, fill the chilies with cheese, do not over stuff!!  About 1/2 cup of cheese per chile is what I do (all depends on the size of the chilies you use).  Coat the chilies with the flour, you can either roll or do what I do, sprinkle it on until it’s completely covered.  On to the tad bit messy part, coating the chilies with the egg mixture.  If you have chilies with stems it’s a bit easier, normally they do so that’s how I’ll describe it.  Hold the chile by the stem, using a spoon, or spatula, or heck, whatever you are comfortable with, to coat completely.  I like to put a big glob on one side then kind of smooth it out, almost like frosting a cake.  It will be lumpy, thick and not totally even, that is good, you want that!!  Just be sure it’s well coated and that you work fairly quick.  Time to fry… I put them in slit side down so the egg mixture will cook, sealing the cut in a way and keep the cheese nicely inside.  Don’t try doing all of them at once, try two at a time.  Turn them so they get evenly browned.  Place on paper towels to drain.
Put some of the special sauce on the plate, place the chile rellenos on top and serve with rice.
Special Sauce Recipe:
6 roma tomatoes
1 large onion
1/2 c. cilantro
1 serrano chile, deseeded
1 c. chicken stock (you could also use water and be fine)
2 tsp. salt
1 tsp. ground pepper
2 tsp. ground cumin
DSC_0239[1]DSC_0241[1]
Place all the ingredients in the blender (or if you are all fancy, your Vitamix) and blend well.  Transfer to a saucepan and cook until it reduces by about half.

Spring Rolls

DSC_1673
Who doesn’t love spring rolls?  I mean, what’s not to love?  And don’t get all healthy on me and go on and on about them being fried…isn’t there a nice tofu blog you could be reading?  They are so versatile, you can use shrimp, pork ,chicken or only vegetables, something for everyone to like.  And did I mention how easy they are to make?  Well they are.

For the Recipe:
1 1/2 tbsp. canola oil
1/2 lb. ground pork
1/2 tsp. white pepper
1/2 tsp. black pepper
4 tsp. soy sauce (divided, 2 tsp. for the pork and 2 tsp. for when you fry the vegetables)
1 tsp. salt (divided, 1/2 tsp. for the pork and 1 tsp. for when you fry the vegetables)
1 tsp. grated ginger
DSC_1664
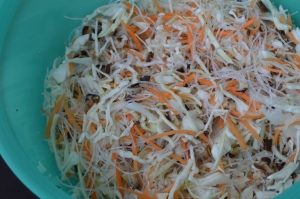
2 c. cabbage, sliced thin
1 1/2 c. shredded carrots (I used my julienne peeler for this)
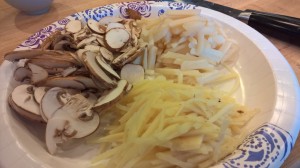
8 dried shitake mushrooms, soaked in hot water for 30 minutes then chopped into small pieces
80 g. bean thread noodles, soaked in warm water for 15 minutes then cut into 2″ pieces
2-3 tbsp. water, if needed when frying vegetables
18 8″ spring roll wrappers
1 egg, whisk well in a bowl
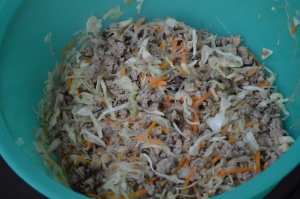
Put the canola oil (or whatever oil you choose to use) into a wok.  Put the pork, both peppers, soy sauce, salt and ginger in a bowl and mix well.  Heat the oil in the wok (or whatever pan you have), add in the pork and cook until almost done, breaking up the pork into small pieces as it cooks.  Add in the cabbage, carrots, mushrooms, bean thread noodles, reserved soy sauce and reserved salt.  If your noodles stick to the bottom of the pan too much add a little water to loosen them.  Cook until the vegetable are just cooked.  Taste for seasoning.  Add more salt, pepper to suit your taste.
DSC_1665
Remove from heat and let the mixture cool.
Once the mixture has cooled you can roll the spring rolls.  The spring rolls can be a tad pesky to unpeel, take your time and don’t pull too hard or you will rip them.  Once you get one off place it so it so a pointed side is facing you.
DSC_1668
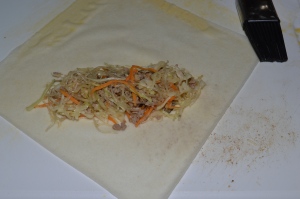
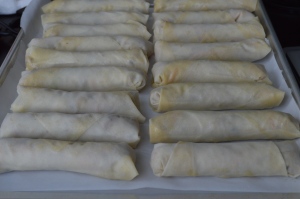
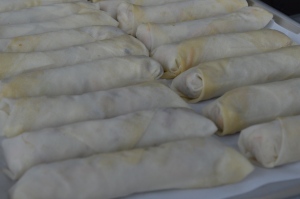
Place 1/4 c. of the filling on the sheet, spread in a line so it’s not just one clump of filling.  Roll the spring roll, tightly.  Once you get about 3/4 of the way to the end fold in the sides, put some of the egg on the side opposite of you to keep the spring roll closed, and continue to roll until the end.  Repeat until all the filling is used.  From here you can either fry them, freeze them, or refrigerate them (no more than a few hours otherwise freeze) until you are ready to use.  If you refrigerate be sure to cover with a very lightly damp towel to keep them from drying out.
DSC_1671 DSC_1672
To fry, heat your oil to 350 degrees in a heavy bottom pot.  Do not overcrowd the pot or the temperature will reduce too much leaving you with greasy spring rolls.  With the correct temperature they should be nice and brown within 3-4 minutes.  Place on either some paper towels or a rack to let the oil drain.  Serve with a sweet chili sauce.
This will normally yield 18 spring rolls.

Japanese Curry Rice

DSC01834
I first had this about 5 years ago when my Japanese neighbor made it for my family.  I couldn’t believe how good this was, I knew I must have this recipe and make it at home.  But she was a lot like me, and really didn’t use a recipe, I asked her husband to help translate the ingredients and their amounts, but let’s just say that didn’t get me much closer to this delicious recipe.  So, in RHOS fashion, I did my own research on the internet and found literally hundreds of versions.  So in true RHOS I made a couple, then took a little from each, adding a little of my touches to come up with what I find to be a delicious Japanese curry rice.  Even my neighbor thought it was good.  WINNING!!
I do this recipe in little steps.  Most overlapping in order to save time, so I’m going to list the ingredients in the grouping of steps.

For the Recipe:
2 large onions, chopped
2 tbsp. butter
1 tbsp. olive oil
2 tsp. salt
1 tsp. black pepper
2 tbsp. garam masala/S&B curry powder

Heat the butter and olive oil in a heavy bottom pot, add the onions, salt and pepper.  Cook over medium heat until the onions are nice and brown.  Add the curry powder.
*****While the onions cook…
DSC01832
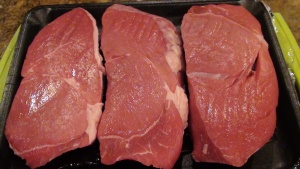
2 lbs. beef, I use sirloin steak
1 tbsp. olive oil
3 tbsp. garam masala or S&B curry powder
1 tbsp. salt
4 c. beef stock
In a pressure cooker, heat the olive oil and add the beef.  Give it a good stir, add the garam masala, salt and the beef stock.  Cover, cook for 30 minutes at the second line. **See note if not using pressure cooker to cook beef**
*****With the onions and beef happily coming along, time to make the roux
DSC01830
3 tbsp. butter
3 tbsp. flour
2 tbsp. garam masala or S&B curry powder
1/2 tsp. cayenne pepper
1 tsp. black pepper
1 tbsp. ketchup
1 tbsp. Worcestershire sauce
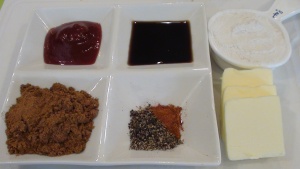
Heat the butter and flour in a small sauce pan.  Stir to make sure the butter and flour are well mixed, cook for about 5 minutes over medium heat.  It should get a little golden, but not much.  Add the garam masala/S&B curry powder, cayenne pepper and black pepper.  Mix well.  Add the ketchup and Worcestershire sauce, mix well.  It should be quite dry and somewhat crumbly.  Set aside.
*****Next, time to chop some carrots and potatoes
DSC01829
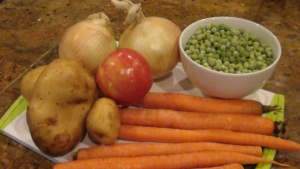
4 carrots, cut into large chunks
2 large potatoes, cut into medium chunks
1 apple, peeled and finely shredded
1 1/2 c. frozen peas
Add the carrots to the onions after they have caramelized, cook for about 5 minutes.  Next, add the potatoes.  The meat should be done (or pretty darn close) so add all the contents of the pressure cooker to this pot.  Add the apple and let this cook for about 20 minutes, or until the potatoes and carrots are tender.  Check for taste adding more seasoning if needed.  Add the peas and cook for 2-3 minutes.  Next, add the roux.  Be sure to stir this in well.  The sauce will thicken, making almost a gravy.  Cook for another couple minutes and tada!!!
Serve over rice.

Enjoy!!

**Note: If you are not using a pressure cooker for the beef, use a heavy pan, like a dutch oven, to make the recipe.  Heat oil in the pan over medium high heat then add the beef to brown, you might have to do this in batches so the beef doesn't steam rather than brown.  Once all the beef is done, you can move on to caramelizing the onions.  Once the onions are nice and brown, add the beef to them as well as the curry powder, salt and stock.  Cook this for one hour, check for meat tenderness.  When it's almost to the tenderness you prefer, then move on to adding the vegetables, first the carrots, potatoes and apple, cook until the carrots and potatoes are tender.  Taste for seasoning, add more of what is needed to fit your taste.  At this point add the peas, cook for 2-3 minutes then add the roux.  Stir well, the sauce will thicken up in about 5 minutes, then it will be ready.

Thursday, February 25, 2016

Knockoff Samoas

DSC_1685
Give me a brown vest with some patches and call me a Girl Scout!!!  These semi-homemade Samoas are so good and fairly simple there’s really not much to love about them.  Last year I made Samoa cookies completely from scratch, baked the shortbread, made caramel, the whole nine yards.  They were spectacular, but time consuming and labor intensive.  So I decided to check Pinterest to see what people were using for a semi-homemade version, I had no clue how many “recipes” would pop up.  Some were pretty good, others were a total stretch.  So I went through ones that had pictures fairly close to the real deal, combined the parts that I liked from each and came up with mine.
The one thing I noticed for a lot of them was the use of the microwave to melt the caramels, but they all complained that after you did it several times (if you don’t work quick enough the stuff gets too difficult to work with) it would taste a little off and be very dry.  I’m a huge fan of double boilers, it’s how I normally do my chocolate so I went that route with the caramels.
DSC_1678
For the Recipe:
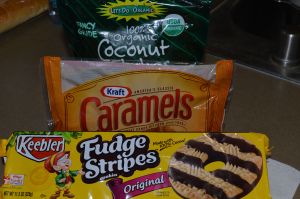
30 caramel squares (I used the Kraft brand)
2 tbsp. heavy cream
2 cups sweetened and shredded coconut **
1 package Keebler Fudge Stripes
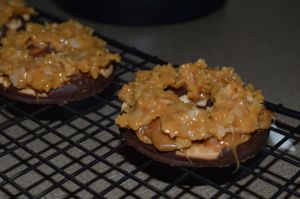
Using a double boiler melt the caramel squares.  When they are about halfway melted add the heavy cream and mix well.  While you are doing this, toast your coconut in a 350 degree oven.  Be sure to keep your eye on this, it will go from looking like it’s not doing anything to burnt in a matter of seconds.  Once the caramel is melted put a layer of just caramel on each cookie, I find this layer helps the caramel/coconut layer stick much better.
DSC_1679
To make it a little easier for myself, I had a cooling rack out so I could place the cookies once they had their little layer of caramel.  After you finish that layer you can add the coconut to the caramel and mix well.  This layer can be a tad sticky, I used a little knife and my fingers to make this step go a little easier.  I tried not to handle the cookies too much while doing this step because they have that chocolate bottom which will start to melt and get all goopy when being held by warm hands too long.  After you get them all covered in the caramel/coconut mixture you can finish them off with their chocolate stripes to make them look like a true Samoa cookie, but since they had those chocolate strips on them (you just cover them with caramel) I didn’t want to, seemed like too much chocolate for me (I know, too much chocolate?).  If you want to, just melt some chocolate and drizzle little lines on top.
On a side note:  I didn’t have shredded sweetened coconut on hand, I had unsweetened coconut flakes.  I was way too lazy to go to the store so I improvised and it worked wonderfully.  I chopped the flakes into little pieces and sprinkled with about 2 tbsp. of sugar before toasting in the oven.  Worked like a charm!!
Enjoy!!

Wednesday, February 24, 2016

Plant a Garden Share the Wealth

Since I was quite young I've always had a garden.  Never anything super large, just your average backyard garden with the usual suspects, tomatoes, cucumbers, zucchini and beans.  As I have gotten older I find my garden getting bigger, it's such a fun activity for me.  Growing vegetables, knowing exactly how they are grown and then being able to share the bounty, that's what gardening is all about.

Since moving to Awesome Opossum I started a Facebook page for gardeners in my area, I've actually met some really nice people through it and learned a lot about this particular growing zone.  One of the suggestions I put out there was for people to share, share seeds, seedlings, vegetables and of course knowledge.  People laugh when they see how many seeds I plant and ask what in the world will I do with all of them, share them, that's what I will do.

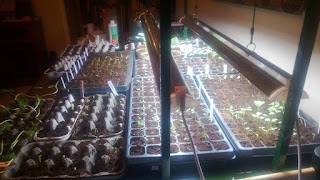
At my previous home I turned my formal dining room into my gardening room, it was a tad crazy. I had grow lights going to the point I had a police officer peek in my dining room window one day.  But all those seedlings eventually found their way into my garden or those of my friends.  Seed packets give you way more than one average person will ever use, so sharing just seems like an obvious choice.

This year I'm scaling way back, but I'm still growing extras to share with the people in my community.  My hope is that others will do the same.


This year's seedlings are well on their way, with more to come.  In fact, just this morning I planted my cucumbers, more seeds will be planted in the coming days.  In a few weeks when they are nice and strong and the last expected frost date has passed I will host a seedling swap where I will invite people to come and do just as the name suggests, swap seedlings.

As the weather warms up I encourage you to get outside and do some gardening, or even start some seeds indoors and get a jump on the growing.  When you have extra, share.


Tuesday, February 23, 2016

Tiered Garden Planter

Last week Mrs. Metalhead , the Homesteading Mama and I went to the Northwest Flower and Garden Show, and it was amazing.  There were so many cool things, came home with a few but mostly got ideas for making later.  Truly, I wish I was more artistic and creative but I'm just not so I have to get inspired by others.  If I were a bajillionaire I would have just went wildly up and down the rows pointing saying "that, that, definitely that and all of those".  But I'm not. 

Today with the winds blowing wildly I decided it was a perfect day to do a little creative gardening and make a tiered garden planter like one I had seen at the garden show.  One big difference...mine cost about $12 and theirs was around $80.

I scored this hanging basket for free on one of the sell/give away sites on Facebook, however, I also have picked these up at garage sales for a couple dollars at most.

The twinadoes and I went foraging in the woods and found this moss growing all over logs, it came off in blankets so it was perfect for lining the baskets.  And in case you were wondering, the forest I'm referring to is my yard, so no I didn't steal.

Next I put a little potting soil on top of the moss, but didn't fill too much because I still had to add flowers.
I used these super adorable pansies and johnny jump ups, they were the perfect size and I absolutely love them.  I also love that they will spread like crazy and you end up with tons of them the next year.  Place the flowers in the baskets then fill in with dirt.  Also  you can either tuck in the excess moss or trim it off.  I actually did a little of both.


Is this not adorable? In all, it took about 15 minutes to construct, not including the time to forage the moss.  I'm hoping to make a few more things that are like what I saw at the garden show that have a lot of chicken wire....  stay tuned!


Skillet Breakfast


This morning I was craving some breakfast that included potatoes, eggs and meat, this fit the bill.  The ingredients can be customized to fit what you want.

For the Recipe:

1 lb. bacon cut into 1/2" pieces
1/2 onion, chopped
1 package frozen spinach, defrosted and drained
3 medium yukon gold potatoes, sliced roughly 1/4" thick
8 eggs
1/4c. half-n-half
1 tsp. salt
1/2 tsp. pepper
1 tsp. garlic powder
1 1/2c. cheese, I used monteray jack and cheddar

Preheat oven to 350degrees

In a cast iron skillet fry the bacon pieces until they start to get browned, over medium high heat. 


Add the onion and cook until the bacon is fully browned and the onions are soft and have taken on some color. 

When I start the bacon I also boil the potatoes in another pot with salted water.  You want the potatoes to be soft or they will not cook thoroughly in the oven, this usually takes about ten minutes of actual cooking time. 


Once the bacon and onions are nice and cooked add the drained spinach and give it a good stir.  Let them all cook together for a few minutes so the spinach gets nice and coated in the bacon grease.  Drain the potatoes.  Also take this time to whisk the eggs in a separate bowl with the cream, salt pepper and garlic powder.

Take out the bacon, onions and spinach from the skillet, turn the heat to low then arrange the potato slices on the bottom. 

Cover the potatoes with the bacon, onion and spinach.  Sprinkle with the cheese then pour over the eggs. 

Place the skillet in the oven for about 20 minutes, or until the eggs are set and it's nice and brown on the top.  If you use a convection oven this time will be reduced.

Enjoy!

Saturday, February 13, 2016

Egg Drop Soup

WP_20150322_13_51_24_Pro
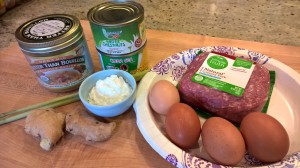
The weather has been a bit crazy here the past few days, one minute the sun is shining and then the next it’s raining.  Today did not warm up much so it was perfect soup weather.  And since I still have a ton of eggs from The Chicken Farmer I thought egg drop soup was the perfect answer.  It’s a pretty easy soup to make and one that you can totally make your own.  Today I made little pork meatballs that I flavored with lemongrass and ginger.  Next time I’ll leave those out, but I had pork that needed to be used so… well you know how that goes.
WP_20150322_11_50_03_ProWP_20150322_12_32_37_Pro

For the Recipe:
8 c. chicken stock, homemade preferred
1 tsp. white pepper
1 1/2 tsp. salt (you might need to adjust this depending on your chicken stock)
1/2 c. water chestnuts, cut into strips or whatever size you like
1/2 c. bamboo shoots, cut into strips
4 tbsp. corn starch
2 tbsp. water
4 eggs, beaten
4 mushrooms, sliced

In a pot over medium, heat the chicken stock, pepper and salt (add salt a little at a time to account for the salt in your stock).  If you are cooking with the pork meatballs now is the time to put them in.  Toss in the chestnuts and bamboo shoots.  Next, in a small bowl mix the corn starch and water, add to the pot and give a good stir.   Let this cook a few minutes to thicken.  Pour in the eggs and mushrooms, stir no more than three times.  Turn off the heat and cover.  The eggs will cook into the little ribbons that make egg drop soup so wonderful in 2-3 minutes.
I’ve had this with corn mixed in and it was great.  You could also dice a little tomato to garnish before serving.  It’s really easy to add or omit whatever ingredients you like.

WP_20150322_12_42_49_Pro

Pork Meatballs:
1/4 lb. ground pork
2 tsp. lemongrass, minced
2 tsp. ginger, grated
1/2 tsp. white pepper
1 tsp. fish sauce
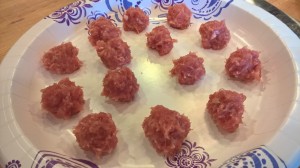
I used a mortar and pestle to mash up my lemongrass and white pepper corns, but you could just mince the lemongrass and us a grinder for the pepper.  Mix all the ingredients together, form into little meatballs.  For the soup you want them to be about a teaspoon.
Enjoy!